Fully Read Instructions Before Beginning Installation
Note: Yucca Manufacturing is not responsible for any damage done to your vehicle or rack system during installation or use of this rack. This is not an accessory endorsed by the vehicle manufacture, by installing this product the vehicle owner is assuming responsibility for any damage done to his/her vehicle. Refer to your owner's manual and fully understand weight and load restrictions for your particular model.
Feel Free to reach out to us at YuccaMnfg via our Contact Page, email at info@yuccamanufacturing.com, or Instagram @yuccamnfg with any questions or concerns.

Included Hardware:
- UV Resistant Rubber Tubing (1 x 11" Pc)
- M6x12 Flange Bolt (16 Pcs)
- M8x20 Button Head Screw (28 Pcs)
- M8 Lock Nut (16 Pcs)
- 3/8" U Bolt (4 Pcs)
- M6 T-Slot Double Nut (8 Pcs)
- U-Bolt Top Plate (4 Pcs)
* U-Bolt Top Plate to be used for Badlands and First Edition models only
Tools Needed:
- Scissors
- 5mm Allen Wrench
- 10mm Wrench
- 13mm Wrench
- 9/16" Wrench
Step 1 - Lay Out the Crossbars and Frames
To begin, lay out the included cross bars from smallest to largest. They are all slightly different in size, the smallest bars will be towards the back of the car. You'll also lay the frames out along the side of the cross bars as pictured.

Step 2 - Install the T-Slot Double Nuts (#6) and Side Frames
REQUIRES 5mm Allen Wrench
Slide the T-Slot Nuts (#6) in the cross bars. You'll install 2 of them on the 1st, 2nd, 4th, and 5th largest crossbars as noted below from the red circles. You'll also install the frames to the sides of the crossbars using the included M8x20 Screws (#3), leave these screws loosened a quarter turn for now. Note: The frames are left and right specific, see the picture above to ensure you are installing them correctly.
Pro Tip: Use #242 Loctite when threading the M8x20 Button Head Screws to ensure they don't come loose during use offroad.


Step 3 - Install Foot Brackets using M6x12 Bolts (#2)
REQUIRES 10mm Wrench or Socket
Using the included M6x12 Flange Bolts (#2), install the 4 foot brackets to the cross bars of the rack. You will screw the flange bolts into the previously installed T-Slot Double Nuts (#6), keep bolts finger tight so they don't slide around for now. Install the foot brackets parallel to the outside frames about 2 fingers away from the bent part of the frame. See below.


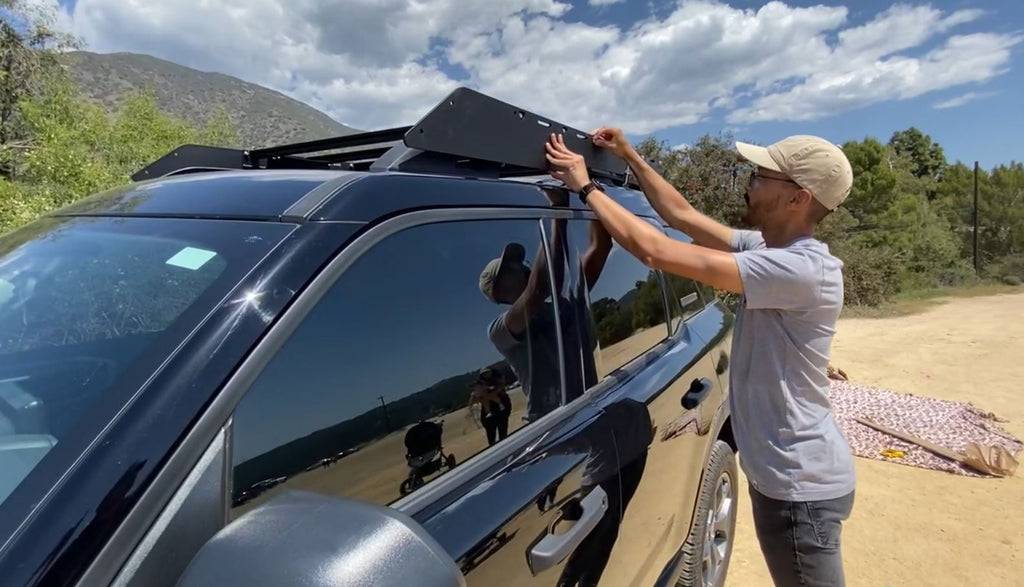
Step 4 - Place the Rack On the Roof Rails of the Car
Grab a friend and go ahead and install the rack system onto the car. Make sure the foot brackets sit on the OEM roof rails as shown below. Once you have the rack on the car, resting on the foot brackets, you can place a side panel on the side of the rack. Center the rack using the body lines of the car, see below. Note: Do Not fully install the Side Panel at this time, simply use it to adjust the rack's positioning.


Step 5 - Install the Supplied U-Bolts (#5) and Rubber Tubing (#1)
Using some scissors, cut the supplied Rubber Tubing (#1) into 4 pieces roughly 2.5" long. Then cut along the length of the tubing pieces and slide the tubing over the center of the supplied U-Bolts (#5), see below.

Step 6 - Secure the Foot Brackets Using the Supplied U-Bolts (#5)
REQUIRES 9/16" Wrench or Deep Socket & 10mm Wrench or Socket
The U-Bolts (#5) will go underneath the OEM roof rails with the threaded ends sticking up through the holes in the bottom of the foot brackets. You will want to loosen the M6x12 Bolts previously installed to allow the foot brackets to freely slide into position. You may need to lift the foot brackets in order to get the U-Bolts through the holes. Once the U-Bolts are through the holes, secure them using the included washers and nuts. See below. Note: make sure the foot bracket is sitting against the inside edge of the OEM roof rails as close as possible. The front of the rack will sit very close to the U-Bolt Threads, they should sit close but should not touch. If they touch, the rack might be installed too far forward.
*Note: The Badlands and First Edition model Bronco Sports have larger roof rails and will require the U-Bolt Top Plates (#7*). The U-Bolt will mount with the outside threaded ends on the outside of the foot bracket, but as close to the roof rail as possible. You will place the U-Bolt Top Plate on top of the foot bracket with the U-Bolt Threaded Ends going through the holes to secure the bracket properly. Then proceed to install the washers and nuts with the U-Bolt assembly. See Below

For Badlands and First Edition

Step 7 - Center Your Rack on the Car
REQUIRES 10mm Wrench or Socket
With the foot brackets secured you will now adjust the rack's angle on the car. If you haven't already done so, loosen the M6x12 Bolts holding the foot brackets. This will allow the rack to slide around more freely on top of the car. Be sure to stand far behind and in front of the car to ensure the rack is sitting straight and centered left to right. Use a tape measure to ensure the corners are equally distanced from the OEM roof rails to help. Once the rack is centered, check the positioning with the side panels once again. With the side panels lined up to the car properly, leave your M6x12 Bolts slightly loose for now as we will check the rack's position once more time once the panels are installed!
Step 8 - Install the Side Panels and Front Fairing
REQUIRES 5mm Allen Wrench and 13mm Wrench or Socket
Now's the time to install the Side Panels to the Frame. Use the supplied M8x20 Button Head Screws (#3) and M8 Lock Nuts (#4) to install the front and rear Side Panels on the rack. Once those are installed go ahead and install the front Fairing as well. See Below.


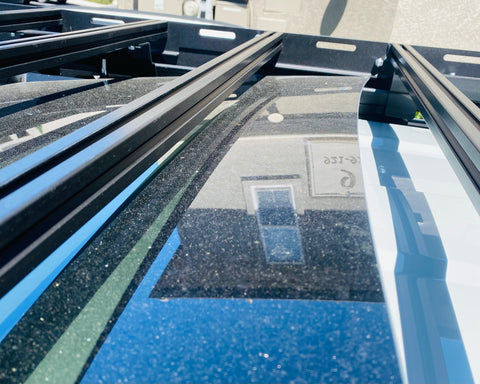
Step 9 - Check for Rack Positioning and Clearance then Crank it Down!
REQUIRES 10mm Wrench or Socket, 9/16" Wrench or Deep Socket, 5mm Allen Wrench, and 13mm Wrench or Socket
With the Side Panels and Front Fairing installed we can check the rack's overall positioning on the car. Make sure the rack clears the roof or the vehicle completely. Also check to ensure the Front Fairing doesn't hit the OEM roof rails. Once you are confident the rack is centered and correctly positioned, go ahead and tighten the M6x12 Bolts (#2), securing the foot brackets to the crossbars. Once this is done go over every nut and bolt on the rack to ensure they are all tight. The Crossbars will be fully tightened at this time. BE CAREFUL when tightening the M8x20 Screws to the Crossbars, the Crossbars are aluminum, meaning they will strip easily if over tightened.
Check for clearance to the roof of the car, sides of the roof rails, and the rear antenna. If you have a sun roof, SLOWLY open the sun roof making sure it clears the front fairing, crossbars, and sides of the foot brackets. Be extremely careful and take your time to make sure there is clearance for the sun roof! It will be a close fit!
Note: If your rack is too far forward or back, you will need to fully loosen the U-Bolts (#5) and adjust the rack accordingly. If your rack angle or side to side position is wrong, you will need to loosen the M6x12 Bolts (#2) and adjust.


Step 10 - Install Accessory Brackets
REQUIRES 5mm Allen Wrench and 13mm Wrench or Socket
The hole pattern on the Accessory Brackets is the same as the holes in the Side Panels for the rack. Simply thread the M8x20 Button Head Screws (#3) through the holes in the Accessory Brackets, Side Panels, and Frame and tighten them down using the M8 Locknuts (#4). Each Accessory Bracket requires a minimum of 2, M8x20 Screws (#3) to secure properly to the rack.
Pro Tip: Use a thin layer of Mastic Tape as a barrier between the Accessory Bracket and Side Panels so they don't scratch.

